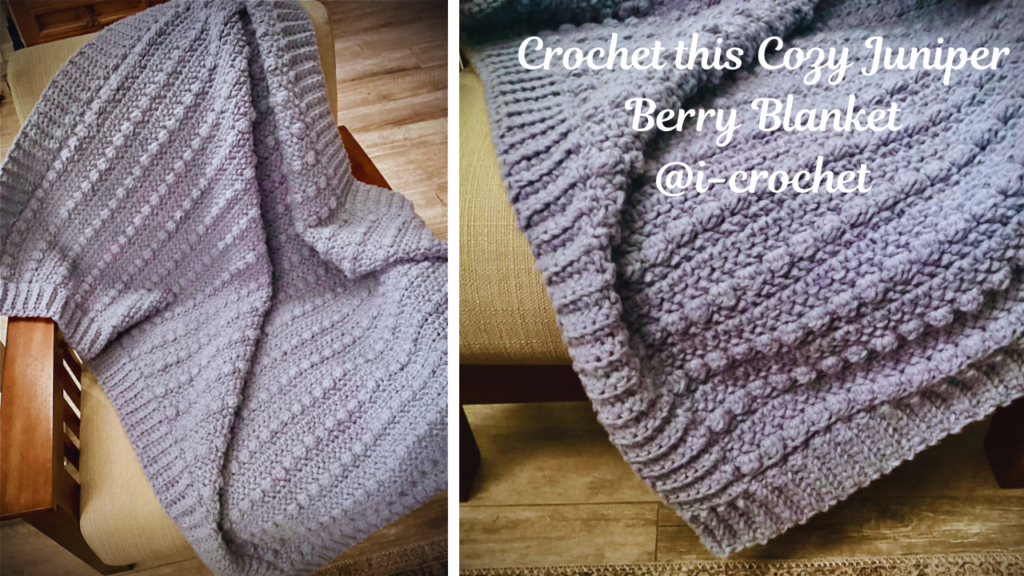
Bernat Forever Fleece super bulky 6 weight yarn in the color Juniper + the even berry stitch = the chunky juniper berry blanket! As always, the Forever Fleece yarn is incredibly soft, like the inside of sweatshirt or a fleece blanket.
Such a pretty, soft purple color makes this perfect for the berry stitch! Combining the berry stitch with rows of herringbone half double crochet leaves you with a lovely textured stitch pattern.
The yarn is incredibly soft and easy to work with. Using a 10mm crochet hook gives you the perfect cushy texture. You’re going to love this blanket!
To make it even more cozy, I added a ribbed border that always reminds of me of a favorite sweater. Whether you enjoy reading a good book or binge watching a favorite show, curling up with this blanket is the perfect way to relax.
Bernat Forever Fleece super bulky 6 weight yarn:
Juniper: 5 skeins for the body of the blanket, 1 skein for a 2” border, a little more than 1 skein for a 3” border.
10mm crochet hook
Sc=single crochet
bs= Berry stitch: yarn over, put your hook in the stitch, pull the yarn through, yarn over, pull through 1 loop, yarn over, put your hook through the stitch, pull the yarn through, yarn over, pull through all 5 loops.
Hhdc=herringbone half double crochet (yarn over, put your hook through the stitch, pull the yarn through, pull the first loop through the second loop, yarn over, pull through the last 2 loops.
Chain 70 or any even number (multiple of 2) of chains.
My blanket is 37” wide x 50” long before the border.
The border adds about 6”, so it ends up about 43” x 56”, which is a good size for a throw to keep on the end of a couch, over a chair, or at the foot of a bed.
Row 1
Sc in the back bump of the 2nd ch from the hook and in each back bump across. (You’ll now have 69 stitches for each row, or one less than your original chain if you made it a different size)
Ch 1, turn
Row 2
Sc in the first stitch
Berry stitch in the next.
Alternate sc and berry stitch across, ending with a sc.
Ch 1, turn
Rows 3-5
Hhdc in the first stitch and in each stitch across.
Ch 1, turn
Repeat rows 2-5 until the blanket is as long as you like, ending with a berry stitch row followed by a row of back loop only single crochet for the final row.
You should be just about finished with the 5th skein of juniper if you’re following my pattern. Just join more juniper when needed.
Border: 8mm crochet hook
Chain 8 for a 3” border.
(note: I was hoping that the border would only take 1 skein, but it took a little more than that. To use only 1 skein, I would make a chain of 6 and have a total of 5 sc instead of 7. You’ll end up with a 2” border. This should work to only use 1 skein.)
Sc in the 2nd chain (back bump works best, but it’s not necessary) and in each chain down for a total of 7 sc.
Skip the stitch that you started the chain in.
Slip stitch in the next 2 stitches.
Turn.
Sc in the back loop only of each sc going back up the row. In the last sc, go in the back loop and the top of the chain with a sc and chain 1. Turn
Sc in the back loop of each sc going back down to the edge of the blanket. (7 back loop sc)
Skip the stitch that you started the row with.
Slip stitch in the next 2 stitches.
Turn.
Sc in the back loop of each sc going back up to the top of the border edge.
In the last sc, sc in the back loop and the chain from the previous row. Ch 1, turn
Continue this pattern until you reach the corner.
Corner:
At the corner, back loop sc up to the outside edge of the border. It should be even with the next side.
At the top, instead of chaining 1, chain 8.
Turn, as you will now be working on the next side.
Sc into the back bump of the 2nd ch and in the back bump of each chain down to the body of the blanket. 7sc
Skip the stitch that the chain came out of,
Slip stitch into the back loop of the next 2 stitches.
Turn.
Sc into the back loop only of each of the 7 stitches going back up the outer edge of the blanket.
Ch 1, turn
Sc into the back loop of each sc, skip the stitch that the last row of the border started from and slip stitch into the back loop of the next 2 stitches.
Continue this pattern. When you reach the edge of the blanket, start using the full stitch when making slip stitches.
Continue until you reach the next corner and follow the same pattern for the previous corner.
When you reach the first row of the border, join with a slip stitch in each stitch to the top.
End with an invisible join to make it seamless.
That’s it!
I hope you find this pattern helpful. If you need help, watch the video or leave a comment and I’ll get back to you within a day.
Debi


