
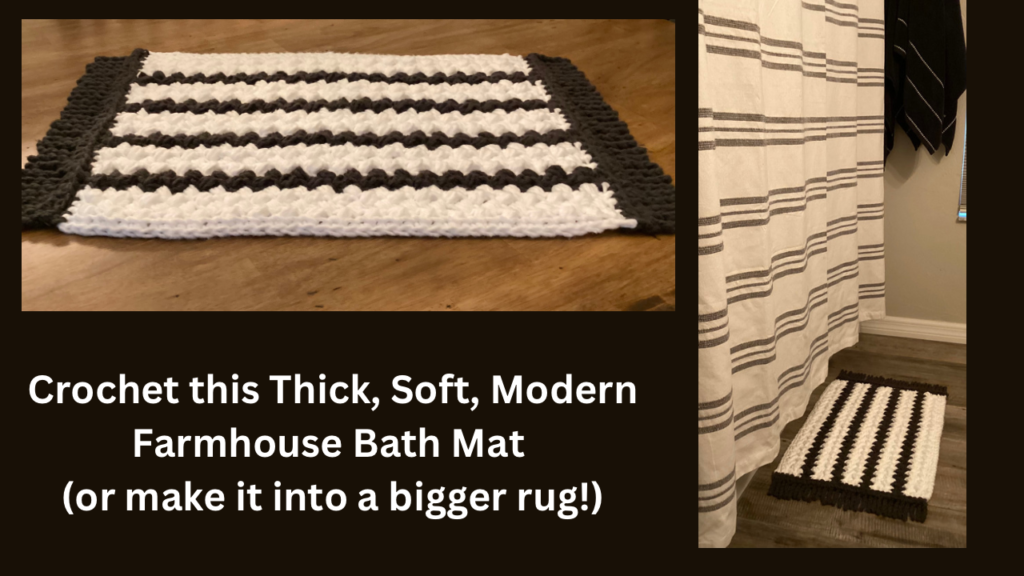
I wanted to get a bath mat to go with the modern farmhouse decor in my guest bathroom, but I couldn’t find exactly what I was looking for.
I decided to make my own! Using a bean stitch with super bulky yarn, I was able to create a soft, thick, cushy mat.
Optional twisted fringe on the ends completed the look I was going for!
There are several options for making it skid resistant. I chose to sew on some rubbery nonskid shelf liner I found at the Dollar General Store. They have it in beige, gray and black. It was the easiest option and also stands up to laundering.
Bernat Forever Fleece super bulky 6 weight yarn (affiliate links. I get a very small commission on items purchased through the links provided.)
Color A: White Noise
Color B: Coal
With color A:
Chain 42 (for an 22” wide rug, 26” with fringe)
For a wider rug, chain any multiple of 2 until the chain is as wide as you like. Remember it will be wider if you add the twisted fringe.
Row 1
Sc in the back bump of the 2nd chain from the hook.
Sc in each back bump across.
Ch 1, turn
Row 2
Sc in the first stitch.
*Skip 1 stitch, bean stitch in the next stitch (put your hook in the stitch, pull yarn through, yarn over, go in the same stitch, pull yarn through, yarn over, go in the same stitch, pull yarn through (6 loops on hook now) yarn over and pull through all 6 loops, ch 1 to lock the stitch.)*
Continue from * to * until the last 2 stitches.
Skip the next to last stitch.
Sc in the last stitch.
Ch 1, turn
Row 3
Sc in the first stitch.
Bean stitch in the left side of the first bean stitch.
Bean stitch in the left side of each bean stitch across.
Sc in the last stitch.
Ch 1, turn
From now on, you’ll repeat row 3.
When changing color, simply drop the current color at the end of the row before pulling through to complete the sc.
Pick up the new color and pull through the last 2 loops to complete the sc.
Ch 1 and continue the pattern.
My pattern is:
4 rows of color A. (Begin the count with the first row of bean stitches)
2 rows of color B.
4 rows of color A.
Repeat the pattern, ending with 4 rows of color A.
Last row:
Single crochet in the back loop only of each stitch across.
Fasten off and weave in your ends. The bulky yarn is very easy to weave in. Weave away from the edge as you will be working into the edge for your fringe.
Optional twisted fringe edges:
6mm crochet hook (7 or 8 would work, I like using a smaller hook for this.)
With the right side facing you, join your yarn in the corner. You’ll be working up the side.
Single crochet in each end of row single crochet.
The first and last group of color A will get 5 sc,
All other color A get 4 sc and color B get 2 sc.
At the end of the row, chain 1 and turn
Now we will make the twisted fringe:
Pull the loop from the chain 1 through, measuring about 3 times as long as you want your fringe. Mine always shrinks more than I think it will after twisting. You’ll be able to tell after the first couple of pieces if they are as long as you like.
Hold the bottom of the loop to keep it from moving, drop your hook and use your finger at the top of the loop. Twist clockwise (away from you) until it just gets snug on your finger. Mine was measured on my hand from my wrist to my middle finger and I twisted 14 times.
Put your hook back at the top of the loop.
Go into the same stitch with a slip stitch, making sure not to pull your twist, and then the next stitch with another slip stitch and pull a loop through. Make another twisted fringe stitch.
Continue making your twisted fringe until you come to the end of the row.
Don’t worry about them being loose or floppy. You’ll straighten them out in the next row.
My last stitch was a slip stitch.
Chain 1, turn.
To keep the fringe from untwisting:
Pull the loop through (from your chain 1) and measure 3 times the length of the edge and cut the yarn. Pull the loop through and tighten it up.
Thread the yarn on a needle. Twist each fringe as you get to it and push the needle through the bottom of the fringe, then move to the next. Tighten or loosen as you go to keep an even tension across.
Weave in the end.
Repeat the twisted fringe pattern on the other side.
That’s it!
I hope you enjoyed this pattern! Let me know if you made it, or if you need any help!
