
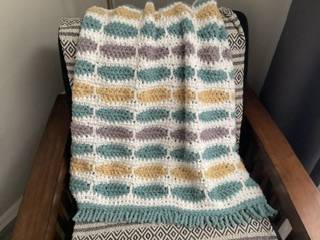

I love these colors, typically associated with a beachy cottage vibe. Just looking at it makes me feel relaxed!
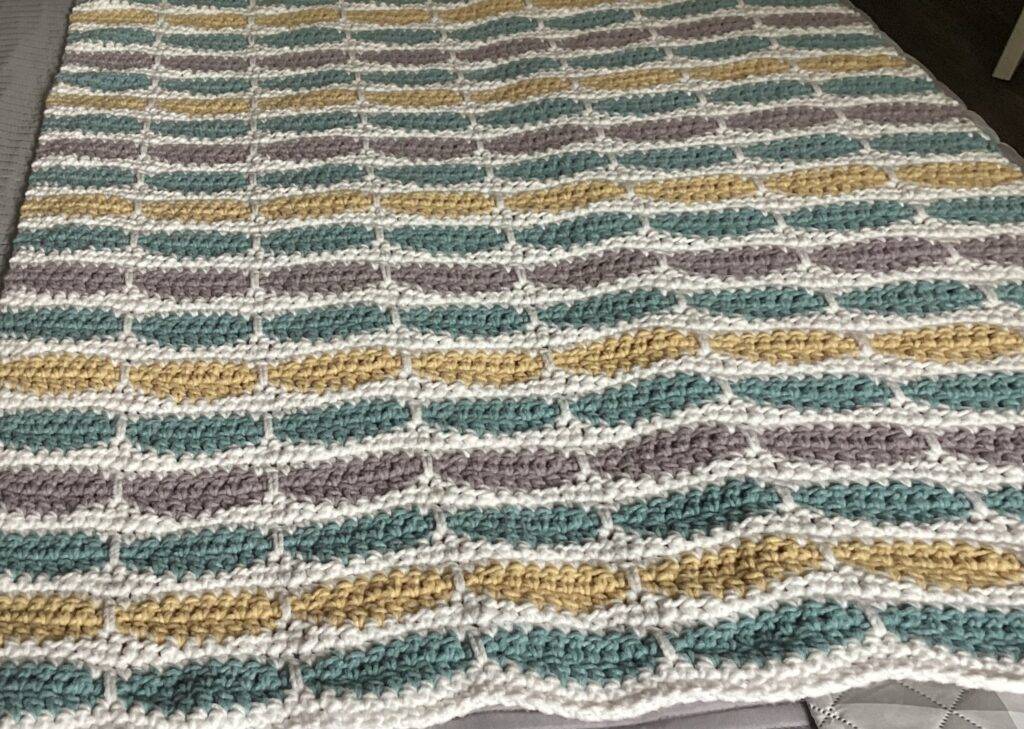
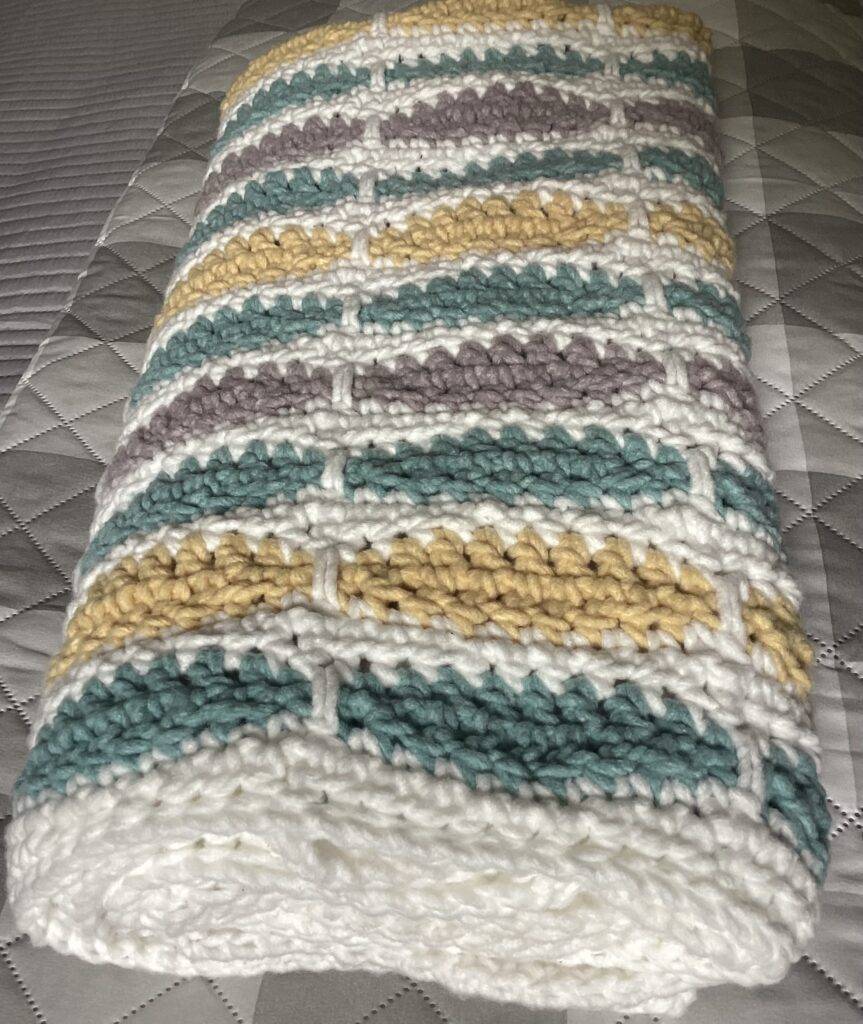
I made the bricks using the colors of water, sun and sand associated with a beach or lake. They’re bordered by a crisp, clean white edge.
The blanket is super soft and chunky. Made in an even brick pattern, it’s similar to the millstone blanket, but instead of being offset, the “bricks” are lined up in rows. It’s a little easier than the millstone in that all the brick rows are identical.
This “beachy” blanket looks perfect with or without a border – you choose!
My blanket is 45” wide x 51” long without a border. A typical throw is 50” x 60”, but this is the perfect size for my loveseat. Every 10 chains adds another brick, which measures about 5.5” wide x 4”high
Bernat Forever Fleece Super Bulky 6 weight Yarn
Color A: White Noise – 2 1/2 skeins
Color B: Dark Eucalyptus – about 1 1/4 skeins
Color C: Chamomile – 1 skein (better price at Walmart.com)
scissors
measuring tape
Tapestry or darning needle
Ch 82 (or any multiple of 10 plus 2 more at the end )
Row 1:
Sc in the back bump of the 2nd ch from the hook and in each back bump across. Ch 1, turn
Row 2:
Sc in every stitch across. In the final stitch, begin, but don’t complete, a sc.
Drop Color A, pick up Color B and complete the sc, ch 1
Cut Color A, leave a long tail for weaving in later.
Row 3:
Sc in the first 2 stitches, hdc, 5 dc, hdc, sc, ch 1, skip 1 stitch
Now the pattern for the bricks, *sc, hdc, 5 dc, hdc, sc, ch 1, skip 1 stitch*
Repeat the brick pattern from * to * ending with 2 sc at the end of the row.
Ch 1, turn
Row 4:
Repeat row 3
At the end of row 4, begin a sc, drop Color B, pick up color A and complete the sc.
Ch 1, turn
Row 5:
Cut Color B, leaving a long tail for weaving in later.
Sc in the first stitch (there will always be 2 sc in beginning and ending of a row, so don’t let that mess up your count)
Sc in the next 9 stitches.
This will bring you to the chain space from the row below.
You’ll be making a dc spike stitch in the Color A stitch below the 2 chain spaces.
Yarn over, go into the stitch from the “border” row below, yarn over and pull it up high to meet height of the other loops on your hook. Yarn over and complete a dc.
*sc in the next 9 stitches, dc spike stitch in the Color A
row below the chain spaces*
Repeat from * to * across ending with 10 sc, because there is always an extra sc at the beginning and ending of each row. This has confused me before.
Ch 1, turn
Row 6:
Now we will straighten out the border.
4 hdc
3 sc
3 hdc
1 dc in the top of the dc spike st
*3 hdc
3 sc
3 hdc
1 dc*
Repeat from * to * ending the row with 4 hdc
In the final hdc, begin but don’t complete it, drop Color A, pick up Color C and complete the hdc. Ch 1 turn
Cut Color A, leaving a long tail for weaving in later.
Row 7 and 8:
Repeat rows 3 and 4 with Color C
Rows 8 and 9:
Repeat rows 5 and 6
Keep repeating the pattern, changing colors as in my pattern or whatever colors you choose.
I used:
White:
Dark Eucalyptus
White
Chamomile
White
Winter Waves
And repeat,
Ending with Color A (white)
For the last rows, if you are not making a border:
Sc in the first 10 stitches, dc spike stitch, sc 9, dc spike stitch, repeat across, end with 10 sc. ch 1, turn.
Last row
*Hdc across until you are directly above the dc spike stitch, sc in the dc spike stitch,*
Repeat from * to * across, after the last hdc, fasten off and cut your yarn, leaving a long tail for weaving in.
Border:

Twisted fringe:
I like the look of the twisted fringe, especially for a blanket. Regular fringe tends to get tangled up in the wash and I find myself constantly straightening it up. This twisted version is much less likely to do that.
I particularly like it on this coastal theme since it resembles rope… so cute!
With the dark eucalyptus (or any of the colors you prefer) join your yarn in the corner of the very first row, opposite the initial chain, make a sc and sc in each stitch across. (Use a stitch marker to mark the corner of the last row, but on the opposite same side as your initial chain)
Ch 1 and turn
Slip stitch into the first stitch, pull up a loop twice as long as you want your fringe to be (I used my remote control as a measurement to make sure they remained even)
Hold the loop at the bottom, with your hook at the top, twist (I twisted 16 times, you may need more or less, just make it the same for each piece as you go along)
Slip stitch into the next stitch, twist your loop a little if needed to get it to stand up.
With that same slip stitch, pull up a long loop and repeat the process for making the twisted fringe.
Check as you’re going along that they are pretty much the same length. It straightens out when you’re finished with the row.
Repeat across, end with a slip stitch and fasten off.
Repeat on the opposite end and that’s it!!
How did you like this pattern? Did you make it in different colors? It would look great in any color combination. I’d love to hear from you!
Debi
